Blog
Notes From the Farm

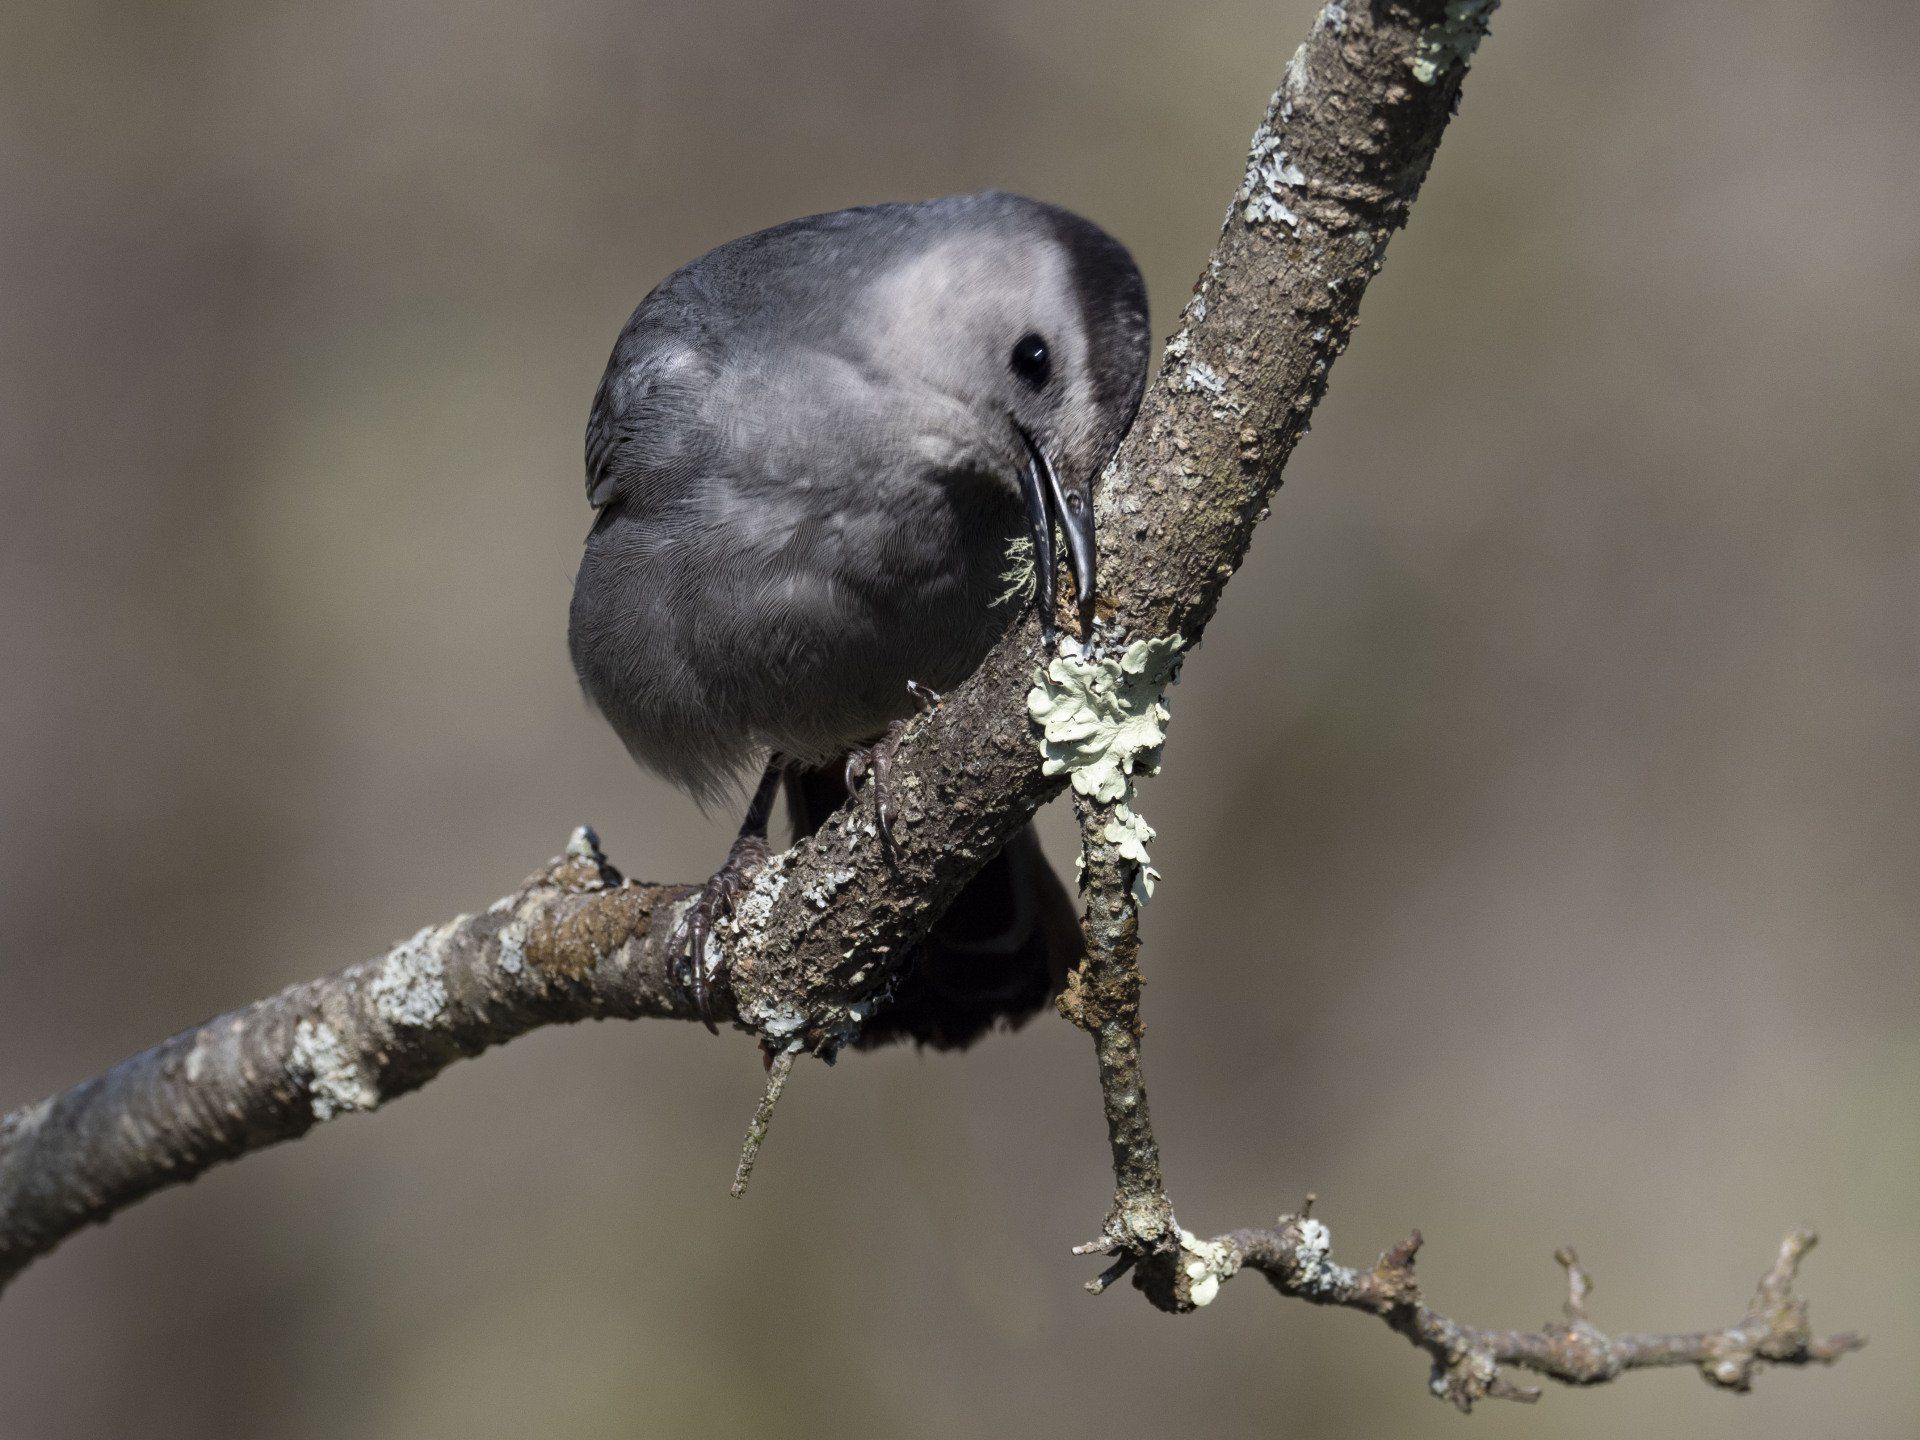
Why I am Embracing New Technology
Some Lessons from The Field As a photo instructor here at Little River Photo Workshops and for Lindblad/National Geographic Expeditions, I see some of the same photographic mistakes over and over again. So I thought I would put together a few ideas for you to keep in mind when trying to improve your photographic skills. A list, kind of, but not the end-all solution to becoming better at the craft. There are many ways and techniques to improve your skills, here are just a few things to help you along that you might want to keep in mind. Photography is as much a way of creating an image in your mind as it is creating an image in your camera. I think it’s important to be comfortable in your head as well as your body when you photograph. So, understand what you have to work with in terms of your gear and go out there and use it to its full potential. To begin with, the first thing I think you should remember is that the equipment other people use has nothing to do with your photography. Don’t be intimidated by camera gear you don’t own. Yes, it’s nice to think about what camera lens or body you want on your wish list, but if you don’t have it yet think about what you can do with the equipment you already have. Every piece of camera gear was made to excel at something, and it’s your job to figure out how to exploit that something and to make a great image. Every piece of gear has its limitations, but you own it because of its potential. When you think of making images in terms of what you can’t do then you will never make great images. It’s not about the gear it’s about what you can do with the gear. Be realistic in your expectations and explore the possibilities. Make creating photos a positive experience. Knowledge is one of the best pieces of gear in your tool kit of photographic resources. Understanding your subject is really key. Sure, some things pop up unexpectedly, but if you are planning on making images of brown bears, you should spend time learning as much as possible about brown bears. Understanding habitats and behavior will allow you to anticipate the animals actions and put you in the best position to make the best images. This applies to any type of photography, not just wildlife. If you’re making landscape images you want to plan the image. Where does the light come from, what time of the day is the light best, where should you place yourself to get the best image. Jay Maisel said, “If you are out there shooting, things will happen for you. If you’re not out there, you’ll only hear about it.” If you want to be a photographer, you have be out there making photos. Be focused and make one image at a time. I was once ask to accompany a group of researchers who thought it would be great to have me come to their study site to photograph their research subjects. The idea of being in the field with the scientists was music to my ears. I thought everyone would be able to show me some great things to make images of. All of the biologists were really excited in the field every time I was about to make a photo the subject of one of the researchers, another researcher would call out through the woods that I should run quick to photograph something else. I felt like a ping pong ball running from one thing to another, but never really having enough time to make a good image of any of the wildlife I saw that day. I was too scattered and could not focus enough on what I was doing. A lesson well learned, now I concentrate on one thing at a time. I might miss some things, but the things I don’t miss give me better images. There is never only one picture, or even if there is, sometimes it takes a while for you to find it. Work your subject, make lots of images. Look at the image from different angles, different levels, different distances. Make many images not one image. It will help you learn how to see in different ways. There are some famous, iconic photos out there. I often see people trying to make the same image. That image was already made. There is a difference between being influenced by someone else’s style and being a copy of someone else’s style. If you are always trying to copy others work you will never develop your own. It is odd to me that I often see this in peoples’ work who are trying to sell these photos. Why would an editor buy a photo from you when someone else already published that photo? Make your own images, show people what you can do, not what others have done. Celebrate the images of others, learn from what they have done, then go out and make images that will make others celebrate your work. I hope that one day you will come to Little River Workshops and become a student of mine, but always remember you are your own best teacher. I can show you how to do something, but unless you go out there and practice what you have learned you will never truly learn it. If you want to learn how to use your camera to its full potential then you will need to use it on a regular basis. It might be a photo technique, or some feature in your camera. Whatever it is, you need to make it second nature. You don’t want to have to think about how to do something when the moment presents itself, you just need to do it. Practice, use your camera, think about photography and think about making images. When I switched to the OM System mirrorless cameras, I did so because of the new capabilities the OM mirrorless system. It is truly amazing what the technology in mirrorless can do, however I soon realized that the new system was much more of a computer than I thought. For me, learning programs does not come easy so I had to practice. Sure I knew the basics and how cameras work, but the new systems could do so much more than previous cameras I have had. I think it was a good three months before I felt completely at ease with my new system. I read manuals, and watched videos but the only way for me to really know my camera was to use it. One of the wonderful things about photography is that enables you to see things others don’t notice. I know how exciting it is to see something new, or to visit a place with exotic wildlife. African safaris, trips to Antarctica are what we all dream about. But each of us lives in a destination. No matter how common the local wildlife is to us, there are others that will pay a lot of money and travel great distances to see what we see in our own backyards everyday. One of your tasks as a photographer is to make a beautiful image, not a beautiful image of something exotic. Make the common special. So whether it’s a polar bear on the tundra, or a lion on the Serengeti, or a chickadee at your backyard bird feeder make it a beautiful image. Find the extraordinary in the ordinary things you see everyday. There is one other thing I want to discuss and it is that wildlife is under more and more pressure from humans. They have less habitat to live in, the climate is changing, and in some cases their food supply is diminishing. Remember this when making images and think about your impact on your subject. If you are experienced at all, you do not need to be told when an animal is under stress, you will know it. You do not want to be the cause of even more stress. I was once in Rocky Mountain National Park driving on the ridge road. Along with many others I saw a black bear walking across the tundra and heading towards the road. Time and time again people pulled their cars right in the way of the bear, causing it to turn and run and to try to cross in another place, only to find the people raced ahead and once again blocked the way of the bear. It was heart breaking and maddening. My only wish was not to make a photo myself, but rather that the bear would finally find a way across the road and would be able to leave these people behind it. Okay, maybe it was not my only wish, but having lightning strike the group of cars and destroying them in a ball of fire is not pertinent to the lesson here. I hear people say they want to see how close they can get without having the bird fly away, which usually translates to seeing how close they can get until the bird flies away. When what you should be asking yourself is how close can I get without it flying away at all. Occasionally, being ethical means that sometimes you miss an image, that is the price we must endure as responsible photographers.
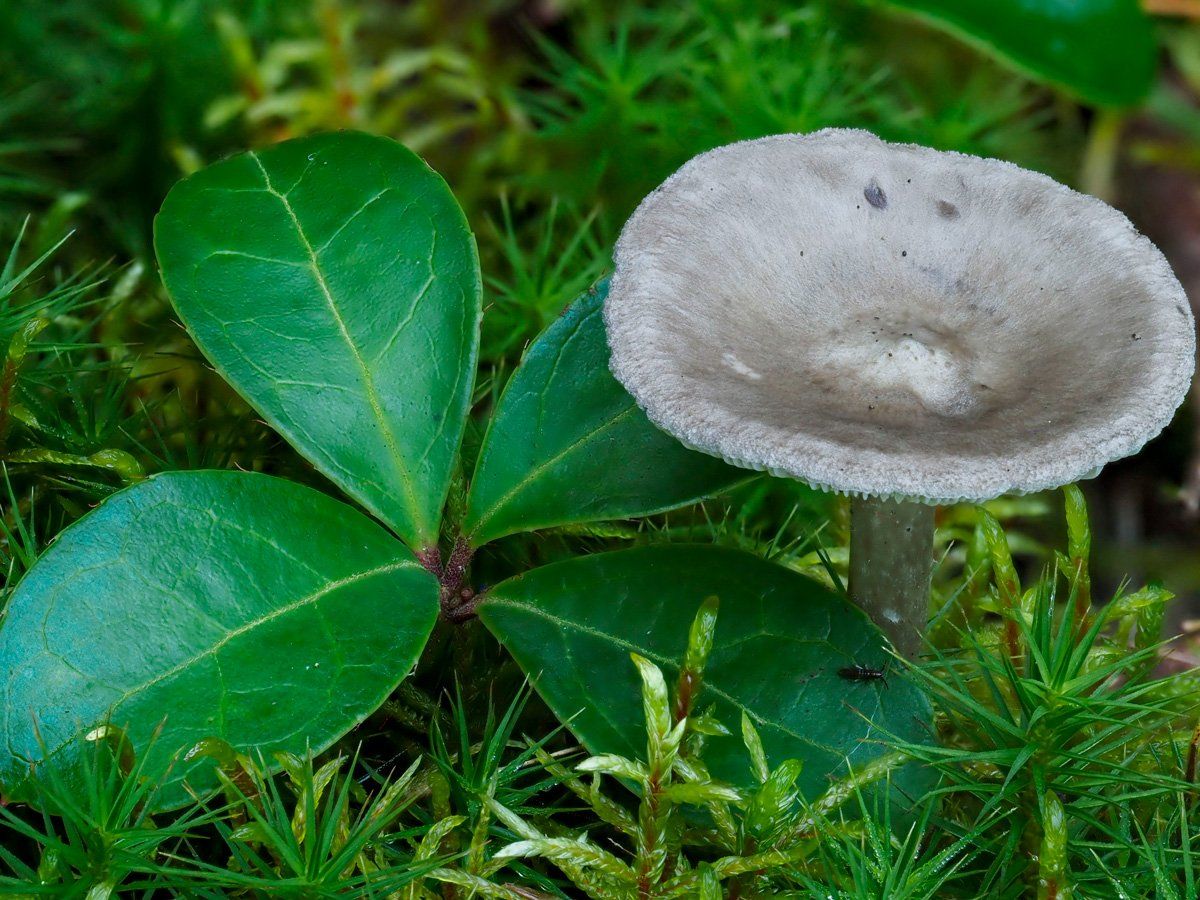
This season has been especially productive for mushroom photography, and I have been enjoying getting out there each day and seeing what new fungus has popped up overnight. There has been so much variety and so much abundance, I think mostly due to all the rain we have had this season. Here at the farm, most of the wildflowers have finished for the season, and with that, so have the butterflies, bees, and other insects I could normally count on for good photo subjects, so having all the mushrooms around has really been a bonus. Each morning, as Glacier (my dog) and I walk along the trails through the forest, I take special note of what has blossomed overnight so I can come back to photograph it. I try to keep my setup as simple as possible. Usually, I bring my two macro lenses, my 60mm and my 30mm. As mentioned before, I am an Olympus photographer, so in terms of full-frame 35mm equipment, those two lenses equate to a 120mm and a 60mm lens. The workhorse is the 60mm, which I find suitable for most circumstances. The 30mm comes into its own on bigger subjects, like clumps of mushrooms together. I carry my little Joby flexible 3K Gorillapod tripod, which suits my compact kit just fine, and is worth its weight in gold in the field. Remember from my previous blog post that it's important to have a tripod that fits your gear. My Olympus OM-D EM 1 Mark III is extremely lightweight so the Gorillapod 3K is all I need. The flexible legs let me contour the tripod to fit any condition and allow me to work at ground level for making images of the mushrooms. I also use a cable release because if you are going to the trouble of using a tripod, why not use every means necessary to keep things stable. Another accessory that can be handy and used in place of a small tripod is a simple bean bag. Any sack filled with beans will do; just make sure it has enough filling of beans or birdseed to support your camera and lens, yet not so full that it won't let the bag cradle your camera. Anything that helps you keep things steady will work. I have used my hat, my jacket, sticks, even my wallet at times to get just the right height and support for my camera. Photography often involves problem-solving in the field, so use your imagination. Photographing mushrooms is fun, but it can be somewhat challenging. The mushrooms I usually want to photograph always seem to be in odd places that require a contortionist to be able to see through your camera. I often use the LCD screen on the back of the camera, so it is much easier to compose the image. The articulating screens are a godsend and help greatly with this endeavor. I then use autofocus for my preliminary focusing but then use one of my Olympus cameras features to get my focusing point right where I want it. In the past, most would make the photo with our aperture closed to our smallest F-stop, the biggest number, and try to get as much depth of field as necessary for our image. That works, but nearly as well as another method commonly used today, focus stacking. This is another feature that I am grateful for on my Olympus camera; the "in camera" focus stacking. Focus stacking makes multiple exposures and focuses on a different point within the image with each exposure. You take all the images, and in post-production, you stack them together and end up with an image that has perfect focus throughout the photo. This works with any camera and simply requires you to make sure each image is exactly the same and that your camera does not move in-between images. The beauty of the Olympus system is that the camera has the ability to do all of that in the camera. It will give me all the many images I made if I want to do the post-processing myself, but it will also stack all the images in the camera and give me the image already stacked. There are sometimes reasons to do the post-processing myself, but I am finding that generally speaking, the camera's version is excellent. Mushrooms love growing in wet places, or at least when things become wet. You can't always wait till things dry off because the mushrooms seem to change overnight in the way they look, and it is not uncommon for a squirrel or chipmunk to eat them. You will find yourself lying on the ground more often than not, so be prepared for damp conditions and dress appropriately. Whenever you are photographing plants, you need to be aware of the plants you are not photographing. It is so easy to trample other mushrooms, or flowers around you, especially if your entire body is going to be on the ground. A ground cloth can cover up small vegetation that you don't even see until you're down on the ground with them. There are times when a ground cloth will work, but make sure you inspect the area well before using one. It may be impossible not to stomp on some vegetation, but it is incumbent for us to be as mindful and as careful as possible as nature photographers. I find it essential to examine the image once I make an exposure. What you see in your viewfinder is often misleading. I specifically look for distracting elements that were not noticeable when I made the image. Pine needles or leaves look very natural to our eyes, but a dry needle or light-colored leaf in the background or foreground comes across on the image like an almost white line or white spot. Your eye naturally is drawn to light-colored areas on the image, so you want to make sure you don't have an unsuspecting pine needle photo-bombing your photo. You may need to tidy up your mushroom and make another image. I tend not to go out into the forest on bright sunny days because the contrast between a dark forest and a sunlit forest is too much for the camera to handle. But sometimes, a ray of light can illuminate a fungus and makes for a mushroom that stands out from the background. Again, an area lit by the sun can show up in your background and be a distraction. Once you make an image, look at your photo. I even carry a loupe to look through to examine what the image looks like once made. Another thing to be mindful of when photographing mushrooms is that they often pop up in places with lots of leaf litter and other forest debris. I have often not realized that the branch I crunched beneath my knee traveled under the leaf litter and ended right alongside the mushroom I intended to photograph. In kneeling on it, I caused the other end to decapitate the mushroom and ruin my image. "Go gently into the night," but more gently into the forest.


